You are here: Home » Testing & Characterization » 3DStrain Testing
3DStrain Testing with Digital Image Correlation Technology
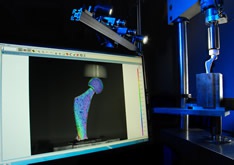
Lucideon’s 3DStrain testing service can offer you vital insights and understanding into performance, durability and failure analysis of your materials and products when interacting with external forces, weights, strains and stresses.
The video clip below depicts a standard tensile specimen under tensile load-to-failure.
Using Digital Image Correlation (DIC) technology our experts can perform testing and analyse the detailed data to provide you with clear, simple, quantitative results.
The technology can:
- Characterise mechanical behaviour of materials or the behaviour of non-homogenous and non-isotropic materials
- Visualise the response of a component or structure under various loading conditions
- Obtain strain maps of components under load
- Verify and refine finite element analysis models of complex geometries.
3DStrain can deliver non-destructive, full-field surface strain measurements on objects under load. We deliver movement tracking at the pixel level on most materials, for a range of sizes on complex geometries.
With Lucideon you receive full analytical interpretation of the data from our experts, allowing you to make use of the vast, in depth feedback quickly and easily. 3DStrain also produces visual results that show how strains and cracks develop and grow, up to the point of failure.
Our 3DStrain service offers you detailed digital imagery showing the displacement on your product, correlated against a no-load condition.
3DStrain testing has applications in the following sectors: construction, aerospace, healthcare and nuclear.
Key features include:
- Quantitative results: calibrated images provide strain or displacement in three dimensions
- Portable system: readily transportable and can be applied in Lucideon or client facilities, or in the field on large structures
- Scalability: it can be applied to large structures such as bridges, down to filaments, fibres, and sub-scale components, including images obtained from a scanning electron microscope (SEM)
- Versatility: can be applied to virtually any material of almost any geometry, under static or dynamic loads
- Non-Contacting and Non-Destructive: enables proof-testing of components without damage
Lucideon has a comprehensive quality assurance program, which is in compliance with 10CFR50 Appendix B, ISO 17025 and Nadcap (aerospace and defence industries). These rigorous QA requirements are applied to every job we perform as standard.
